|
| | |
|
XmlID,GroupName,ClassList,CtrlBtn,d,n,UserName,Date,Time,ChildNum,ClickNum
$XmlID$$GroupName$ $CtrlBtn$
$html$
作者: $UserName$
於 $Date$ $Time$ 發表
評論: $ChildNum$ 瀏覽: $ClickNum$
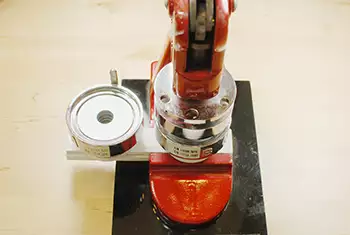
.dataBlogList { }
.BlogListMenu { width:100%; height:30px; text-align:center; line-height:100%; }
.BlogListMenuS { width:1px; background:#ff8844; }
.BlogListMenuL { width:10px; background:#ff8844; }
.BlogListMenuR { width:10px; background:#ff8844; }
.BlogListMenu0 { background:#ff8844; padding:0px; vertical-align:middle; }
.BlogListMenu0:hover { background:#ff4422; padding:0px; vertical-align:middle; }
.BlogListMenu1 { background:#ff4422; padding:0px; vertical-align:middle; }
.BlogListMenu0 a { color:#ffffff; }
.BlogListMenu1 a { color:#ffffff; }
.BlogListN_1 { }
.BlogListD_0 { padding:5px; margin-right:10px; margin-bottom:10px; border:1px solid #cccccc; }
.BlogListD_1 { padding:5px; margin-right:10px; margin-bottom:10px; border:1px solid #cccccc; }
.BlogListCont { width:100%; height:30px; color:#333333; }
.BlogListHTML .BlogInfoClass { width:auto; margin-left:0px; margin-right:auto; } /* 分類 */
.BlogListHTML .BlogInfoAuthor { text-align:left; } /* 作者 */
.BlogListHTML .BlogListDate { text-align:left; } /* 日期 */
.BlogListHTML .BlogInfoState { text-align:left; } /* 狀態 */
.BlogListHTML .BlogInfoBtn { text-align:right; } /* 按鈕 */
.BlogListCtrlBtn { vertical-align:middle; width:100%; text-align:right; }
.BlogListCtrlBtn .OrdIdx { width:20px; text-align:right; border:1px solid #888888; padding:0px; margin:0px; height:16px; }
.BlogListCtrlBtn .MsgCmd { font-size:11px; border:1px solid #888888; padding:0px; margin:0px; height:18px; }
.BlogListCtrlBtn .XmlID { float:left; font-weight:bold; }
.BlogListCtrlBtn select { display:none; }
.BlogListHTML { width:100%; }
.BlogListHTML .meMsg_MsgTitle { }
.BlogListHTML .meMsg_Content { margin-top:10px; }
.BlogListHTML .meMsg_MsgURLList { margin:0px; padding:0px; }
.BlogListHTML .meMsg_MsgURL { list-style:disc; margin-left:20px; }
.BlogListHTML .meMsg_MsgFileList { margin:0px; padding:0px; }
.BlogListHTML .meMsg_MsgFile { list-style:disc; margin-left:20px; }
.BlogListHTML .meMsg_MsgListBlk { display:none; }
.BlogListHTML .meMsg_MsgImg img { max-width:100%; margin-bottom:10px; }
.BlogListHTML .ImgAlignLeft { margin-right:8px; }
.BlogListHTML .ImgAlignRight { margin-left:8px; }
.divPageCtrl { margin:10px; clear:both; }
.divPageCtrl table { margin-left:auto; margin-right:auto; }
.MsgRow1 { margin-top:10px; }
.cssPagePanel { clear:both; }
.MsgRow1 { margin-top:$BlogListMsgRow1$; }
.BlogListList { padding-left:$BlogListMsgRowL$; }
#ns_Content .meMsg_MsgBlk .meMsg_MsgTitle { font-family:$BlogListTextFont$; color:$color$; font-size:$size$; font-style:$style$; font-weight:$weight$; }
#ns_Content .meMsg_MsgBlk .meMsg_MsgTitle a { font-family:$BlogListTextFont$; color:$color$; font-size:$size$; font-style:$style$; font-weight:$weight$; }
#ns_Content .meMsg_MsgBlk .meMsg_MsgTitle:hover { font-family:$BlogListOverFont$; color:$color$; font-size:$size$; font-style:$style$; font-weight:$weight$; }
#ns_Content .meMsg_MsgBlk .meMsg_MsgTitle a:hover { font-family:$BlogListOverFont$; color:$color$; font-size:$size$; font-style:$style$; font-weight:$weight$; }
#ns_Content .meMsg_MsgBlk .meMsg_Content { font-family:$BlogListHTMLFont$; color:$color$; font-size:$size$; font-style:$style$; font-weight:$weight$; }
#ns_Content .meMsg_MsgURL { margin-left:$padding$; color:$color$; font-size:$size$; list-style:$BlogListFileSpot$ $pos$ $img$; }
#ns_Content .meMsg_MsgFile { margin-left:$padding$; color:$color$; font-size:$size$; list-style:$BlogListFileSpot$ $pos$ $img$; }
#ns_Content .meMsg_MsgURL a { font-family:$BlogListFileFont$; color:$color$; font-size:$size$; font-style:$style$; font-weight:$weight$; }
#ns_Content .meMsg_MsgFile a { font-family:$BlogListFileFont$; color:$color$; font-size:$size$; font-style:$style$; font-weight:$weight$; }
.BlogListHTML .meMsg_MsgTitle { border-bottom:$BlogListTextHTMLS$; display:block; }
.BlogListD_0 , .BlogListD_1 { border:$BlogListMsgB$; }
.BlogListD_0 , .BlogListD_1 { padding:$BlogListMsgP$; }
.BlogListD_0 , .BlogListD_1 { margin-right:$BlogListMsgL$; }
.BlogListD_0 , .BlogListD_1 { margin-bottom:$BlogListMsgT$; }
.BlogListD_0 , .BlogListD_1 { background-image:$BlogListBgImg$; background-position:$pos$; background-repeat:$repeat$; }
.dataBlogList { width:$BlogListHTMLWidth$; }
.BlogListHTML { margin-top:$BlogListHTMLTop$; }
.BlogInfoClass { display:$BlogInfoClass$; }
.BlogInfoAuthor { display:$BlogInfoAuthor$; }
.BlogInfo { display:$BlogInfo$; }
.BlogDisp { display:$BlogDisp$; }
.BlogInfoStatus { display:$BlogInfoStatus$; }
.BlogListHTML .BlogListDate { display:$BlogInfoDT$; }
#ns_Content .BlogListHTML .meMsg_MsgContent { display:$BlogContBlk$; }
#ns_Content .BlogListHTML .meMsg_MsgURLList { display:$BlogContBlk$; }
#ns_Content .BlogListHTML .meMsg_MsgFileList { display:$BlogContBlk$; }
#ns_Content .BlogListHTML .meMsg_MsgFromEnd { display:$BlogContBlk$; }
#ns_Content .BlogListHTML .meMsg_MsgListBlk { display:$BlogContBlk$; }
.divPageCtrl { display:$PageCtrlDisp$; }
 直徑5.8公分有別針、鏡子、磁鐵三款。 直徑7.5公分有別針、相架、磁鐵三款。  步驟五右邊凹槽(B槽)放入別針底座。 (可替換成鑰匙圈、磁鐵底座)
關鍵字
7.5cm 胸章 7.5cm 胸章組 5.8cm 胸章 5.8cm 胸章組
|
43055胸章製作2015-11-2411:33:2739489MsgArticle---
ZC137583
ZC137583
1
1
總覽
0
3349
 熱轉印心型杯  
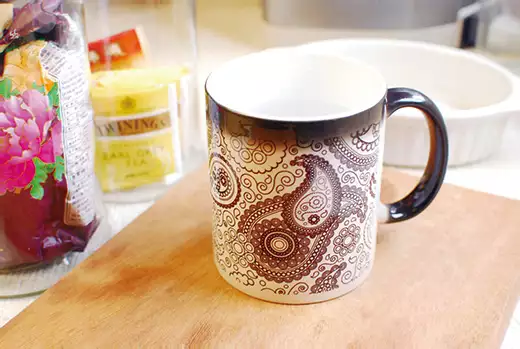
熱轉印變色杯  步驟一設計杯面圖案,可用各種彩繪工具繪製於學習單上,或用電腦作圖、攝影等..各種表現方式皆可。
電腦作圖解析度需設定300dpi,影像尺寸: 馬克杯(變色杯、心形杯):20 x 8.5 cm 湯匙杯(牛奶壺):20 x 6.5 cm  
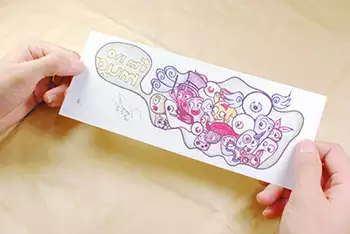
步驟二使用熱昇華墨水將圖畫列印出來,此時須檢查圖案是否已經水平反轉,圖畫上是否有髒污需處理。
由於熱昇華墨水價格高昂,列印步驟廠商會代為處理, 使用者僅需檢查收到的圖片,熱昇華墨水顏色較為暗沈,圖案飽和度偏低為正常現象。  步驟四圖案朝內,將轉印紙貼在杯子外圍。使用標簽貼紙固定四個角落。 此時要注意,標簽貼紙要避免覆蓋在另一面的圖案上,以免轉印後留下痕跡。
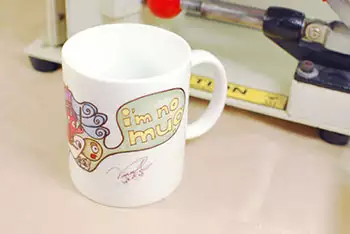
 步驟五按下紅色開關,開啓烤杯機電源。 靜置3~5分鐘,待機器達到工作溫度180度。  步驟六烤杯機溫度會徘徊在175~185之間,此時即可開始轉印。
 步驟七將貼好轉印紙的杯子放入烤杯機,壓下並扣緊紅色把手,使加熱墊緊貼杯面。
 步驟八若感覺壓力不夠,可調整紅色膠珠,反覆嘗試直到加熱墊確實服貼杯面。
 步驟九扣緊杯子後,按下綠色計時開關,開始計時3分鐘,時間到會有音樂提醒。
 步驟十時間到後,關閉綠色開關、扳開紅色把手,握住杯柄取出杯子, 切勿觸碰杯柄以外的地方,以免燙傷。
 步驟十一杯子取出後,使用夾子或貼紙固定轉印紙,掀開一角檢視轉印圖案是否均勻, 確定圖案轉印完整後,再撕開全部轉印紙。
 步驟十二若掀開一角發現有未轉印完全的部分, 可將杯子以上下反轉的方式,再烤1.5分鐘,使其受熱更均勻。
關鍵字
熱轉印心形杯 熱轉印馬克杯 熱轉印變色杯 熱轉印牛奶壺
|
42550熱轉印馬克杯2015-11-1211:38:3239489MsgArticle---
ZC137583
ZC137583
2
0
總覽
0
4811
 步驟三將要放圖案的地方,先塗上專用膠,若塗太多可以回收利用。
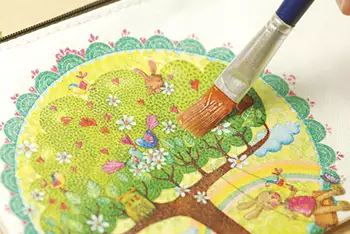
 步驟五接著在圖案上塗抹專用膠,由中間往四周平刷,並避免氣泡。
 步驟六上完膠後,檢查是否有需補強的地方,待風乾後即完成。
 步驟一在木器上塗上底色,也可使用原木色。 (先用砂紙研磨上色效果更佳)
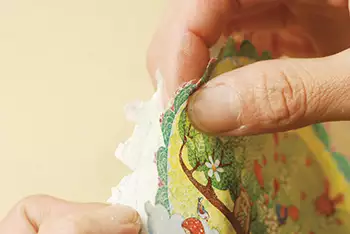
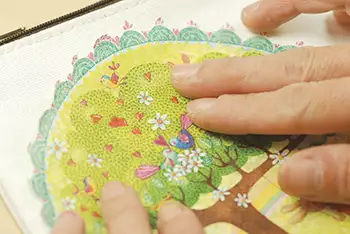
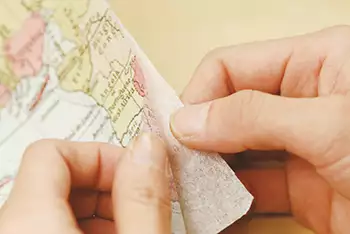
 步驟五放圖案的地方,先塗上專用膠,利用手指往四周推平紙巾紙。
 步驟六在圖案上塗抹專用膠,由中間往四周平刷,避免氣泡產生,風乾後即完成。
關鍵字
蝶古巴特杯墊 蝶古巴特零錢包 蝶古巴特筆袋 蝶古巴特百寶袋 蝶古巴特直式面紙套 蝶古巴特餐具袋 蝶古巴特圍裙 蝶古巴特束口背袋 蝶古巴特直式便當袋 蝶古巴特橫式便當袋 蝶古巴特大手機套 蝶古巴特小托盤 蝶古巴特大托盤 蝶古巴特長方珠寶盒 蝶古巴特方形珠寶盒 蝶古巴特筆筒 蝶古巴特木杯墊 蝶古巴特時鐘 蝶古巴特觸控燈 蝶古巴特木衣夾
|
42487蝶古巴特布包 / 蝶古巴特木器2015-11-1016:38:5839489MsgArticle---
ZC137583
ZC137583
3
1
總覽
0
14421
 拼點子票夾  
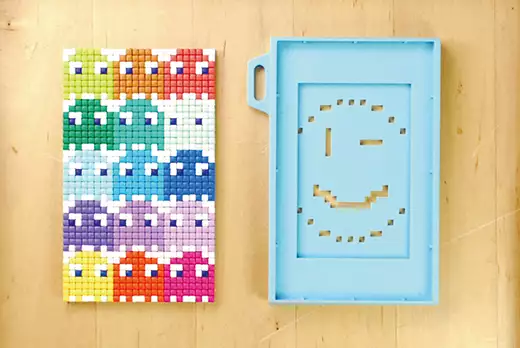
背面可放置悠遊卡等票卡。  拼點子小吊飾  拼點子創作畫
關鍵字
拼點子創意四方 拼點子創作畫 拼點子小吊飾 拼點子隨身票夾 圖案書
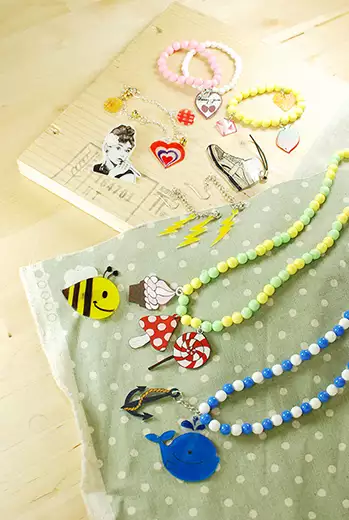
|
42483拼點子2015-11-1013:32:3939489MsgArticle---
ZC137583
ZC137583
4
0
總覽
0
10542
 兩種尺寸:3mm 以及 5mm
相同面積裡,3mm膠珠排列數量約為5mm膠珠量一倍,密度較高,適合細緻圖案,製作時間也加倍。  步驟二 若圖案含文字或具有方向性,需要排列水平翻轉後的鏡像。  步驟三 排好後蓋上隔熱紙,熨斗預熱至中溫,熨燙膠珠,直到膠珠彼此粘合即可。(亦可熨燙兩面,增加強度)  步驟四 可用加熱的粗針穿孔(或排列時預留一個洞),穿上單圈、鎖圈、手機吊飾等,即完成!
關鍵字
3mm麗彩膠珠創作組 5mm麗彩膠珠創作組 5mm膠珠100g裝 3mm膠珠100g裝 5mm膠珠10g裝 3mm膠珠10g裝 麗彩膠珠小模版5mm用 麗彩膠珠小模版3mm用 麗彩膠珠大模板5mm用 麗彩膠珠大模版3mm用
|
42482麗彩膠珠2015-11-1012:13:1439489MsgArticle---
ZC137583
ZC137583
5
1
總覽
0
4688
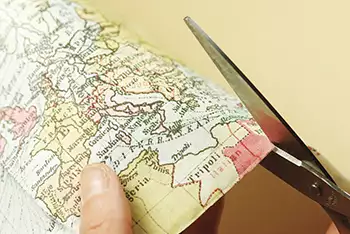
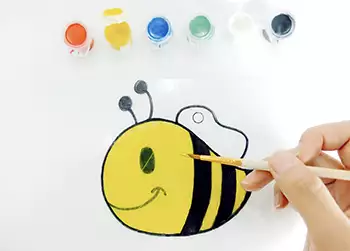
 步驟一用奇異筆將線條繪製在膠片上,其他顏料則先用砂紙打磨後再上色。
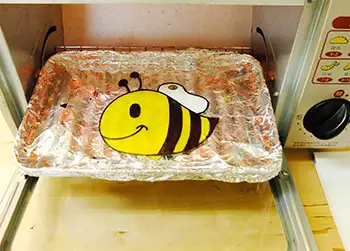
 步驟三烤箱預熱後,先墊張紙片,再將膠片放入以中溫加熱。
 步驟四膠片縮小至恢復平整後,即可連紙片一併取出用重物壓平。
|
42435神奇熱縮膠片2015-11-0911:58:4139489MsgArticle---
ZC137583
ZC137583
6
0
總覽
0
2646
| |
| | |
|
| |